Removable prostheses with mixed implant/mucosal support combine the aesthetic advantages of removable prostheses with the stability provided by implants. The protocol for creating this type of prosthesis can be complex for both clinicians and dental technicians. This paper illustrates a simplified dental technician protocol, which starts with the creation of a diagnostic prosthesis. This is used as a guide for implant placement and, once duplicated, for recording the impression and occlusal relationships and for obtaining an aesthetic prototype. The management of the milled bar is also simplified, thanks to the use of screw-retained attachments with reduced dimensions and a superstructure made of PEEK. Thanks to the measures illustrated in the article, it is possible to provide the patient with an aesthetic, stable prosthesis that is easy to maintain from a hygienic point of view.
More and more often, edentulous patients come to the clinician with a specific request: to have fixed dentures. However, while implant-prosthetic treatment in the lower arch does not present any significant technical difficulties in most cases, there are a number of variables in the upper arch that must be taken into account when formulating the treatment plan and which, if underestimated, can lead to failure. The shape of the maxillary bone and soft tissues can make it difficult for patients to clean the implants and prostheses, which are too often designed to meet aesthetic requirements alone, neglecting the importance of hygiene, a fundamental requirement for the long-term success of implant-prosthetic restoration [1,2]. For these reasons, an implant prosthesis must be designed before the implants themselves are placed, and their insertion must be “guided” by the prosthesis itself [3]. In addition, in the upper arch more than in the lower arch, the shape and position of the lip also contribute to aesthetics, and must be supported correctly to restore facial harmony and phonetics [4].
It is on the basis of the above that removable prostheses with mixed implant/mucosal support are used. This type of prosthesis is also called “hybrid” because, on the one hand, the implants also perform a support function (as in Toronto Bridge prostheses) and not only a retention function (as in overdentures), and on the other hand, the prosthesis can be removed by the patient. The Anglo-Saxon definition is often “milled-bar overdenture” or “fixed/removable overdenture.” In particular, according to Misch’s classification, a removable prosthesis is referred to as “RP-4” when the support is completely implant-supported and “RP-5” when the support is mixed [5]. The latter type,
the subject of this paper, is indicated when the following conditions are present simultaneously:
The purpose of this article is to provide a simplified dental laboratory protocol, compared to the classic one, with the intention of increasing the precision of the restoration and reducing the difficulty of implementation and the time required for processing.
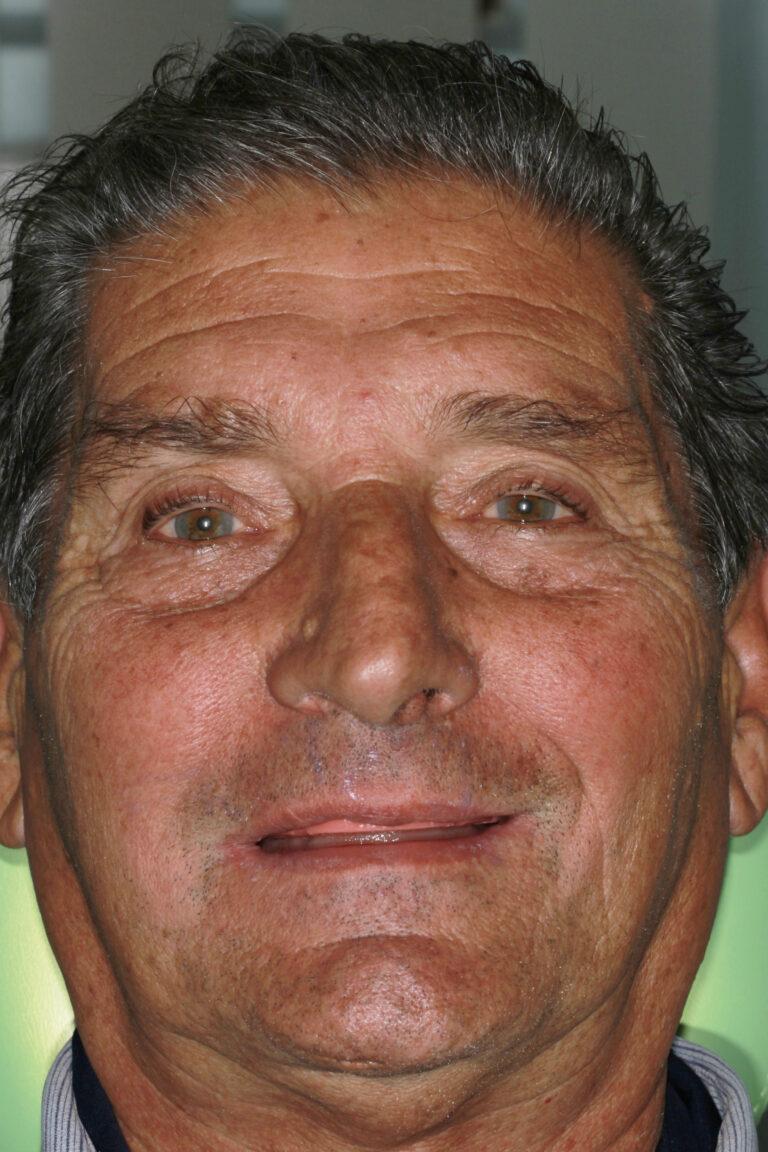
The patient, a 54-year-old male, non-smoker, with no significant ongoing medical conditions, presents to the clinician with total upper edentulism. Teeth 34 to 45 are present in the lower arch. He wears an ill-fitting removable full denture, with which he complains of difficulty in chewing and speaking. He expressed psychological distress due to his oral condition in relation to his age, which hindered communication with his colleagues at work. He also expressed a desire to replace the removable upper denture with a prosthesis that, in his words, “stays in place in the mouth and does not have a palate.”
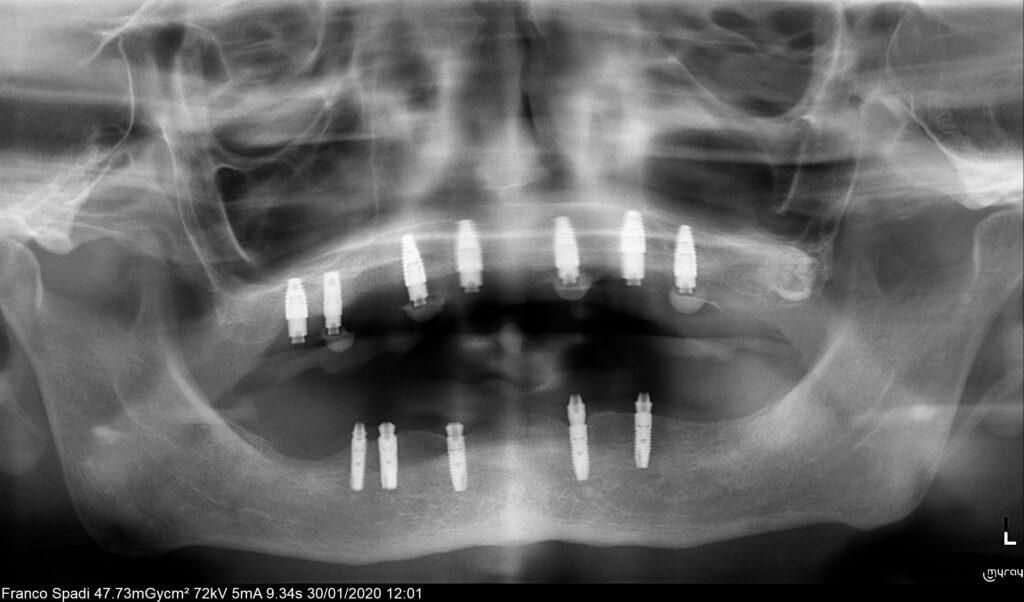
The clinician proceeds with the creation of a new temporary removable upper total prosthesis of a diagnostic type, periodontal treatment of the lower elements, and the creation of a temporary removable lower partial prosthesis. Once aesthetics and occlusion on a correct masticatory plane have been restored, the need to maintain the vestibular flange to support the upper lip becomes clear. Diagnostic tests are then performed to study the positioning of the implants (orthopantomography, computed tomography). In agreement with the patient, the clinician develops the following treatment plan: installation of four implants, with emergence in 14, 12, 22, and 24, and creation of an implant/mucosal-supported prosthesis on a milled bar on the upper arch; maintenance of all lower elements and creation of a removable partial denture (skeletal prosthesis) on the lower arch.
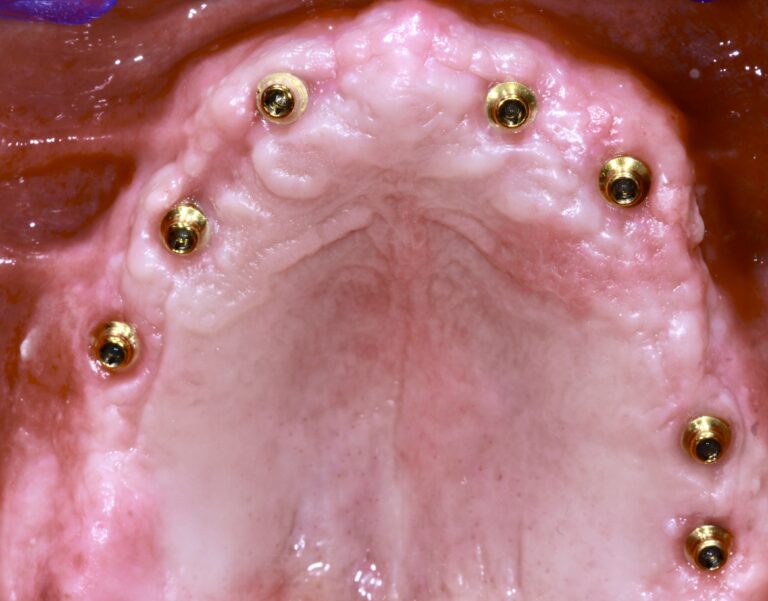
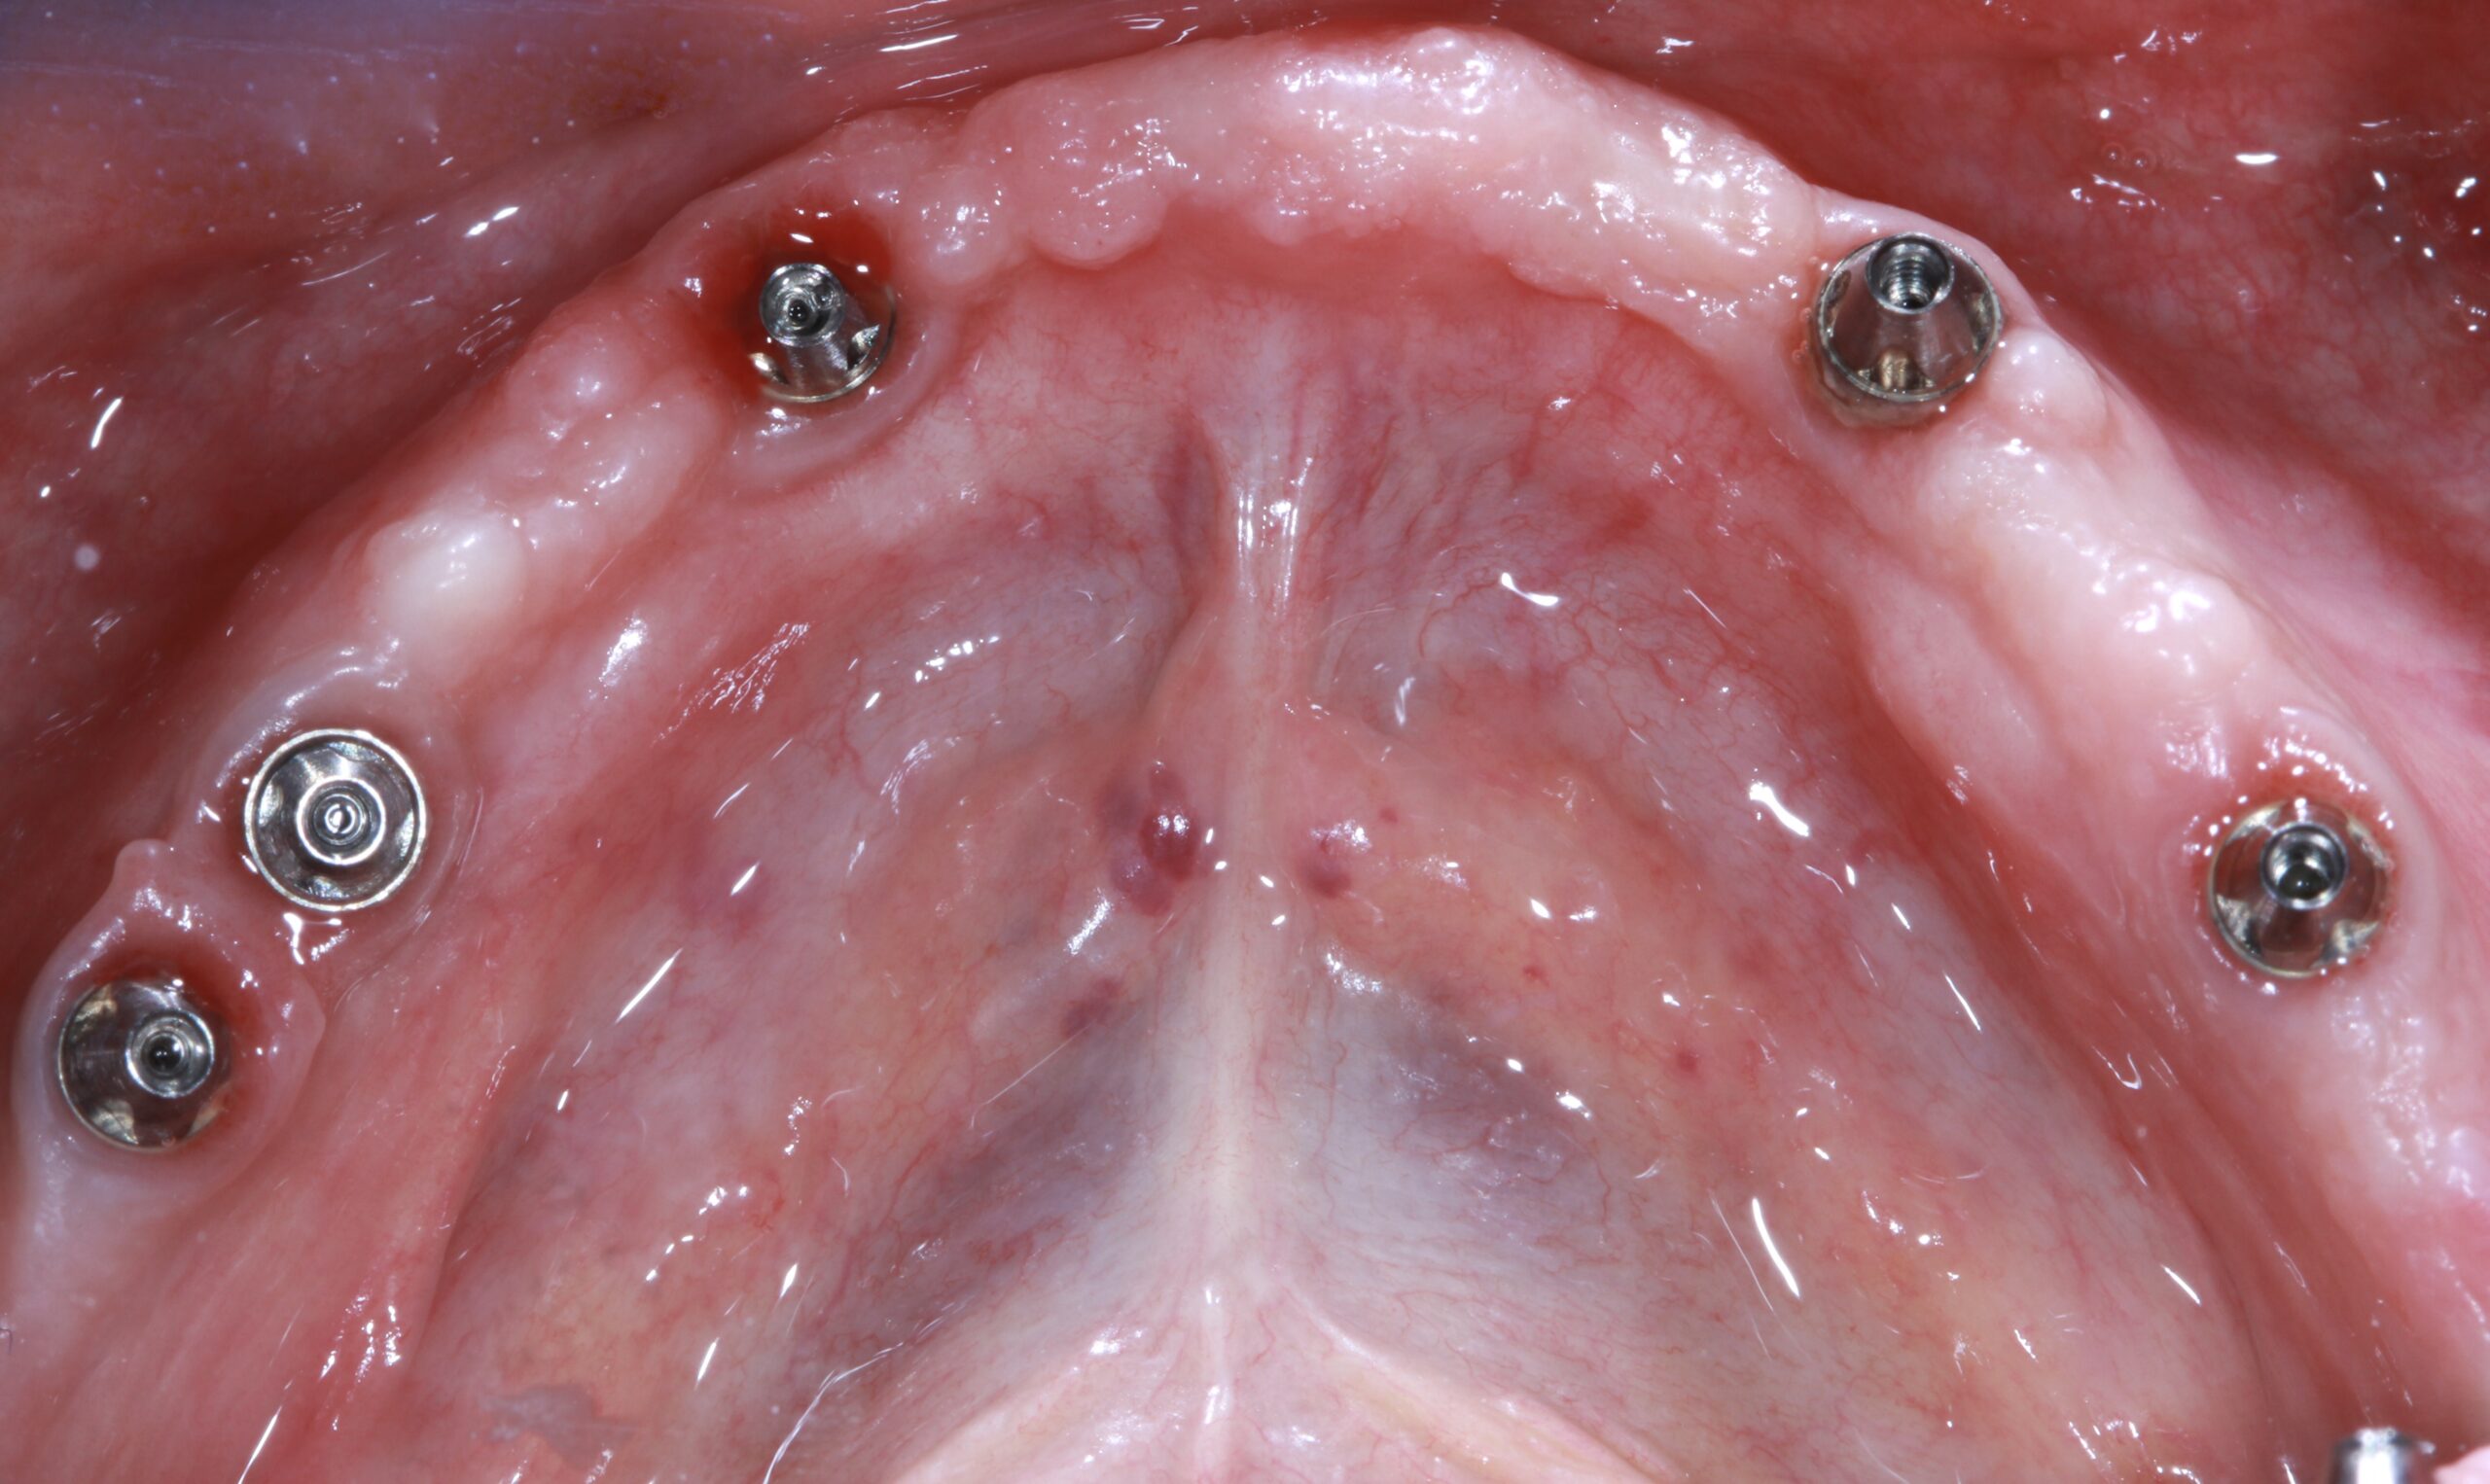
Once the implants had been installed, their position having been determined on the basis of both bone availability and prosthetic requirements, the patient waited for osseointegration to take place with the temporary total prosthesis, suitably modified. During this period, the patient underwent maintenance periodontal therapy. The same prosthesis was used as the starting point for the final restoration.
Precision silicone with a hardness of 70 Shore-A was placed inside the temporary upper total prosthesis. The prosthesis and the silicone model thus obtained were placed inside a mold. An insulator (silicone spray insulator, Transformer) was applied and more silicone was placed between the replica and the mold cover, which was closed and held in place until the silicone had polymerized. The prosthesis was removed from the mold and two holes were drilled through the upper silicone (diameter: 0.5 cm inlet channel, 0.3 cm outlet channel) to allow the transparent acrylic resin to be poured in. The resin was mixed and poured into the mold, which was kept at 50 °C for 25 min at a pressure of 2.5 bar. Once polymerized, the mold was opened and the replica was finished with rotary instruments mounted on a laboratory micromotor and delivered to the clinician.
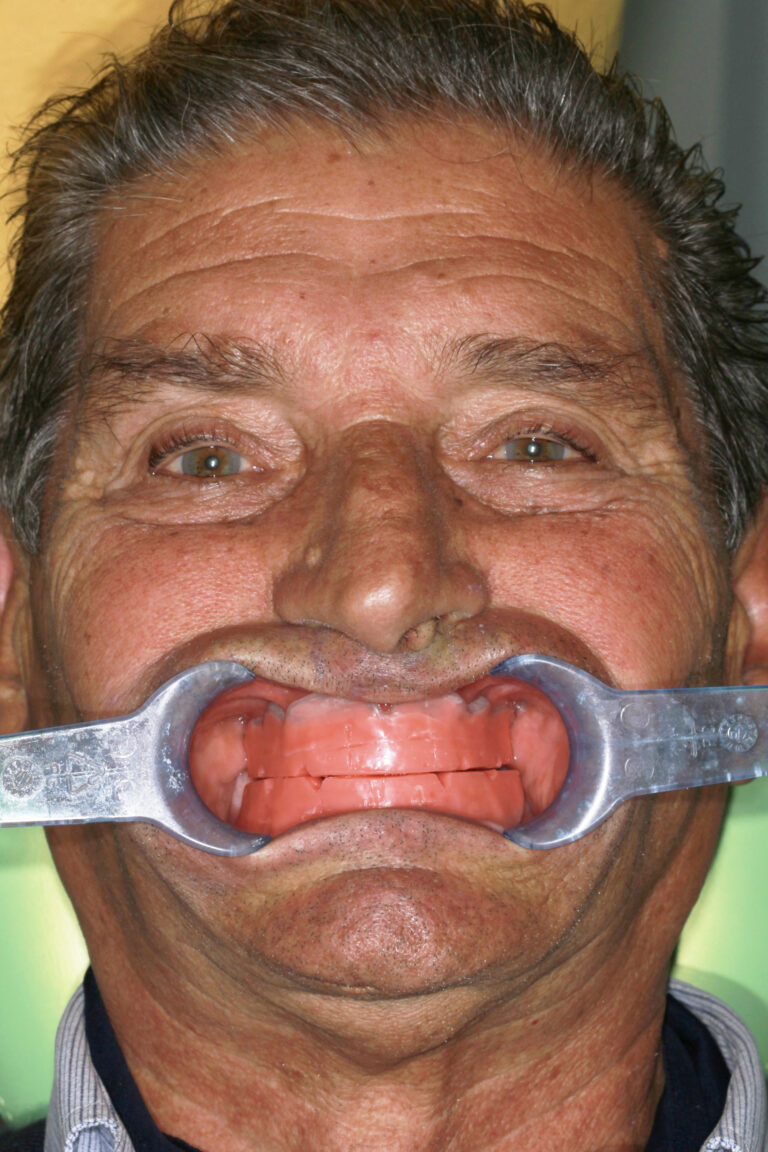
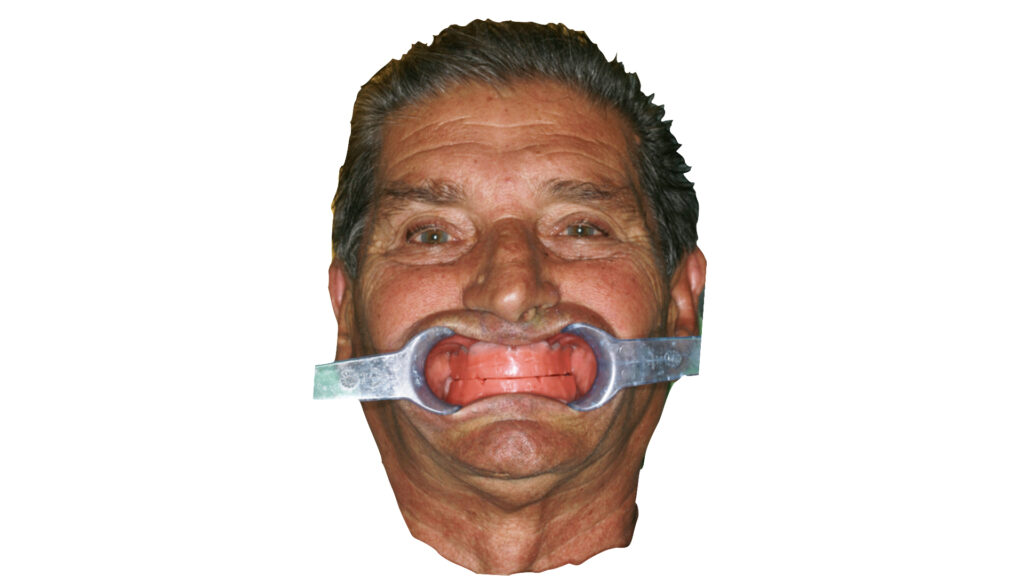
The transparent resin replica was used, in a single appointment, as an individual impression tray, as an occlusal reference (checking the vertical dimension, the masticatory plane, and the relationship with the antagonist), and as an initial aesthetic test (smile line, midline). The clinician positioned the replica inside the oral cavity, checking the occlusion and retouching any abnormal contact points. The occlusion position was recorded using an ultra-fast addition silicone. The replica was drilled at the implant emergence points and an adhesive was placed inside it. An addition silicone was used to record the impression, and the replica was held by the patient in the occlusion position until the material had polymerized. Before removal, its position was recorded with a facebow. Once the replica had been removed from the oral cavity, the silicone inside the holes was removed with a scalpel to allow the pick-up transfers to be inserted.
The replica was placed back inside the oral cavity and the transfers were screwed onto the implants. Holding the prosthesis in place, the transfers were secured to the replica using low-contraction light-curing resin. The transfer fixing screws were removed and the assembly was sent to the laboratory after undergoing the disinfection protocol (Fig. 1).
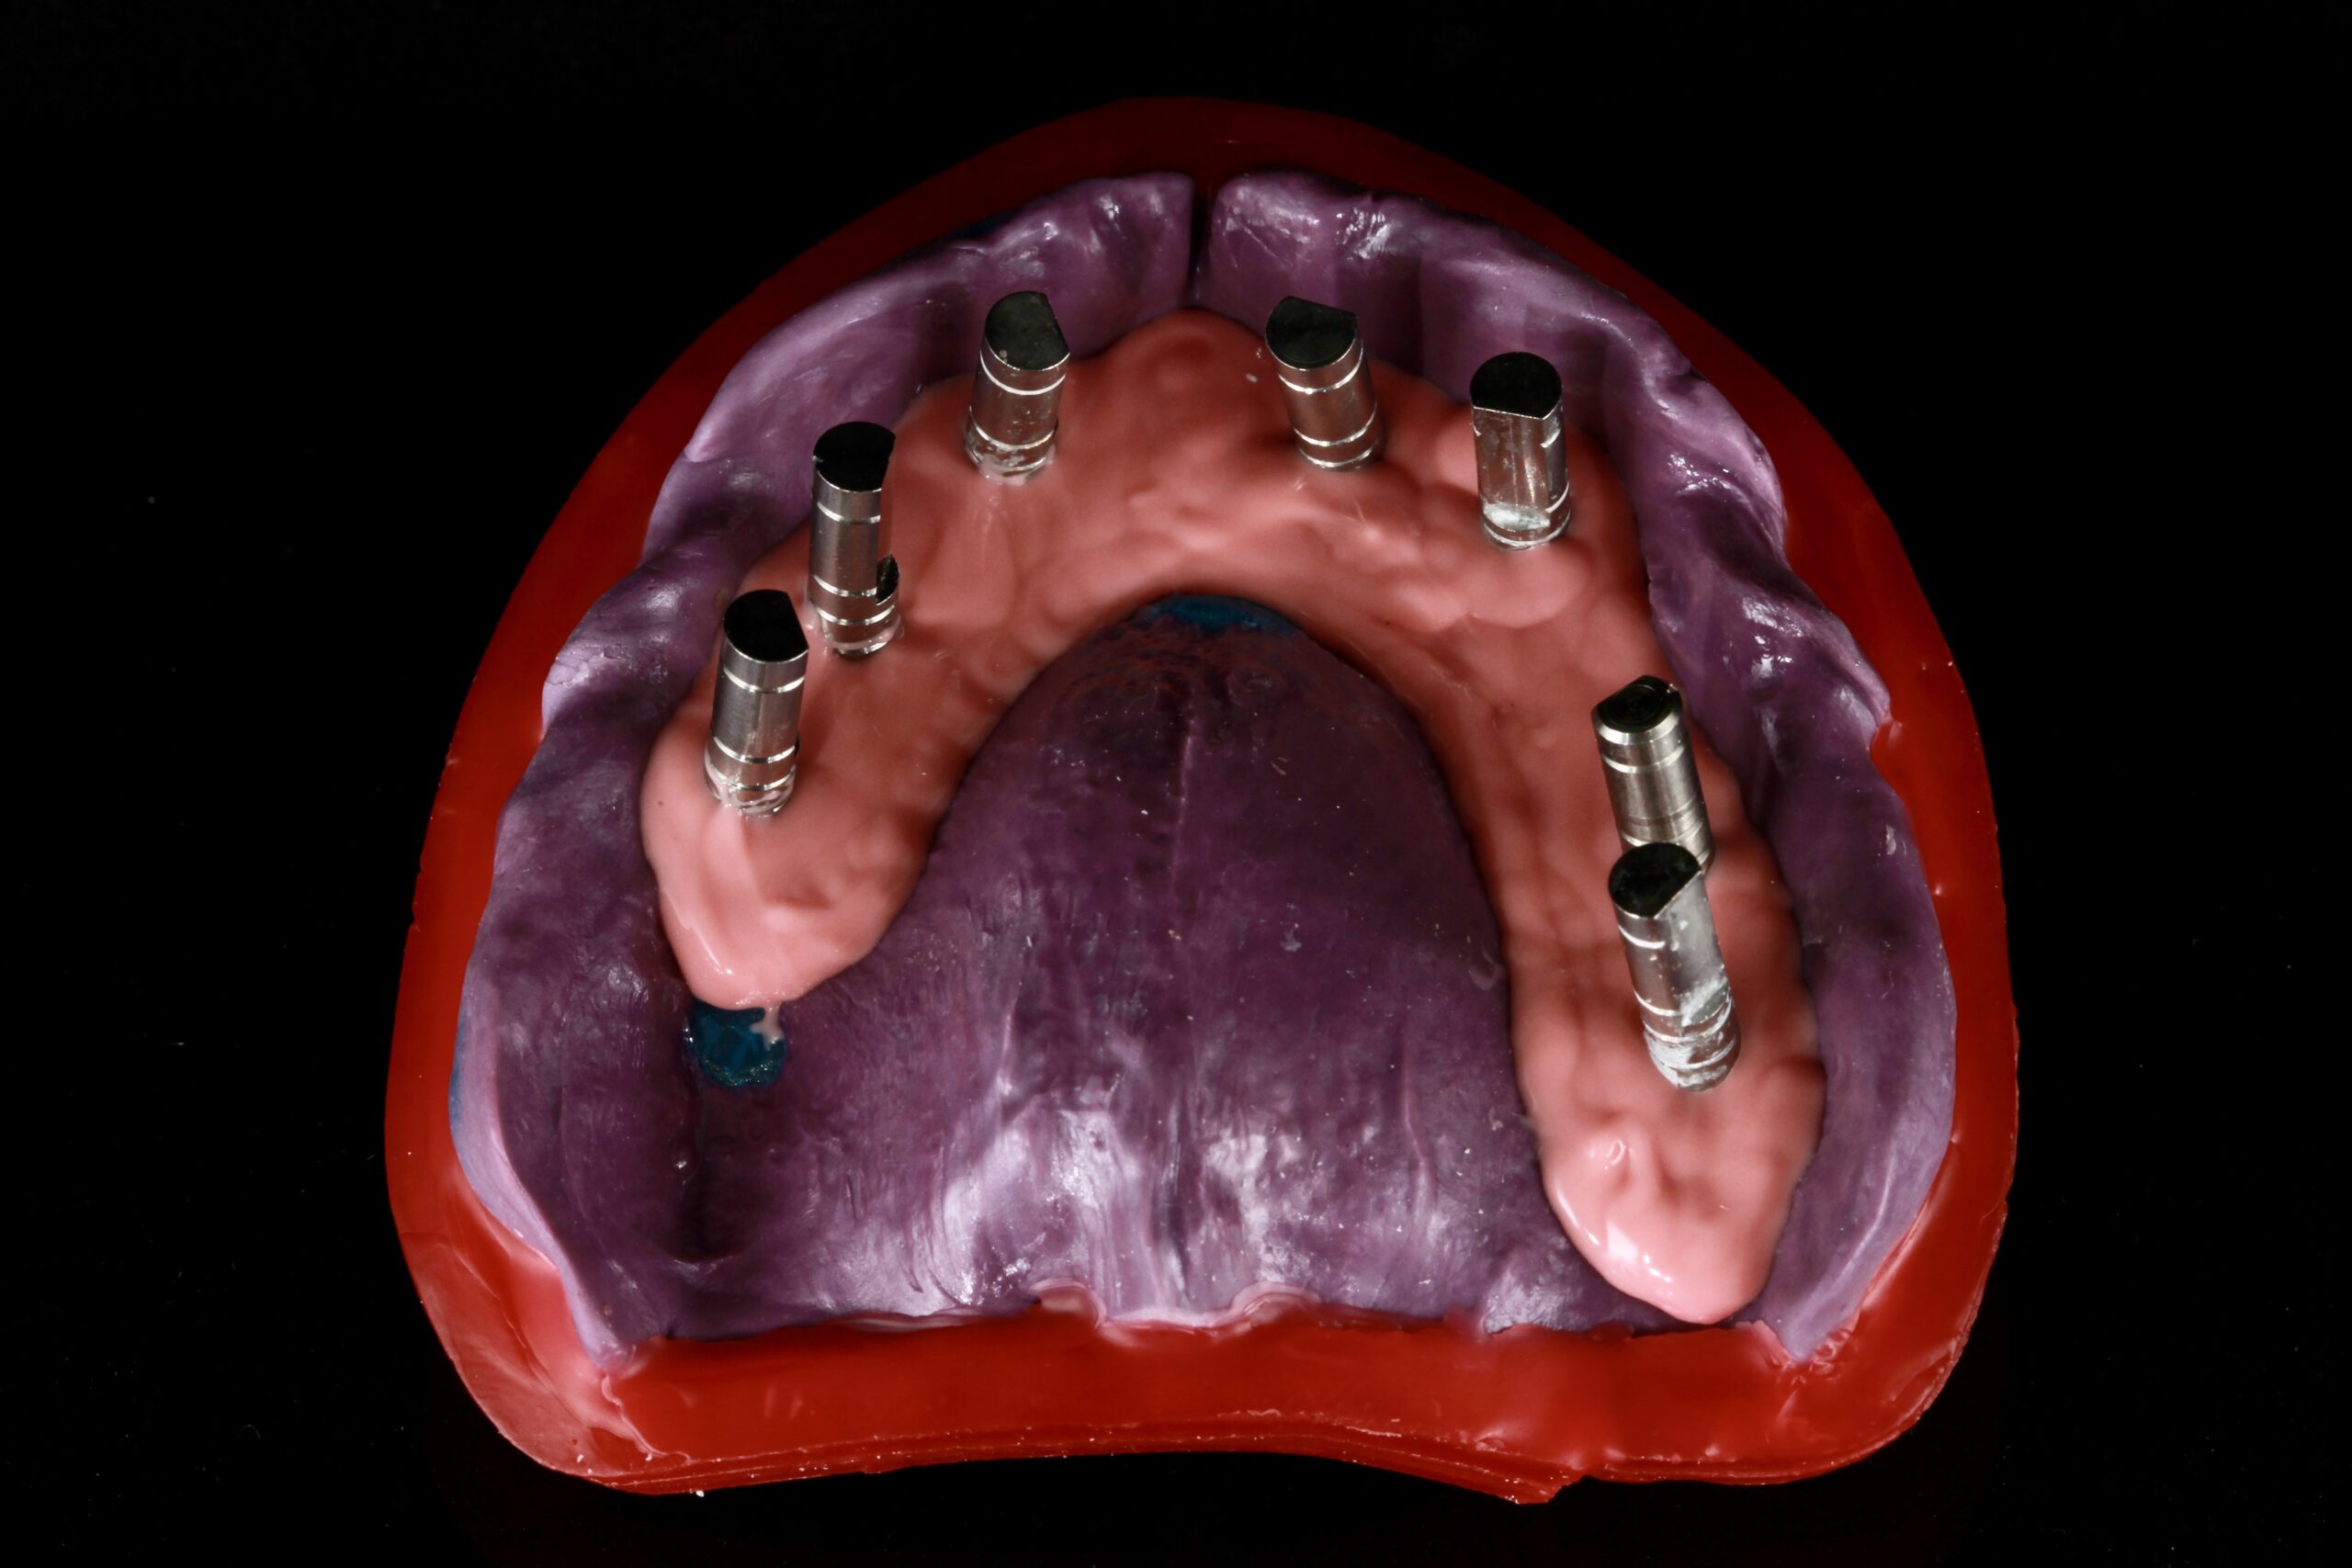
In the area around the transfers, silicone was poured to reproduce the gingival tissues, after applying the insulating material provided (Fig. 2).
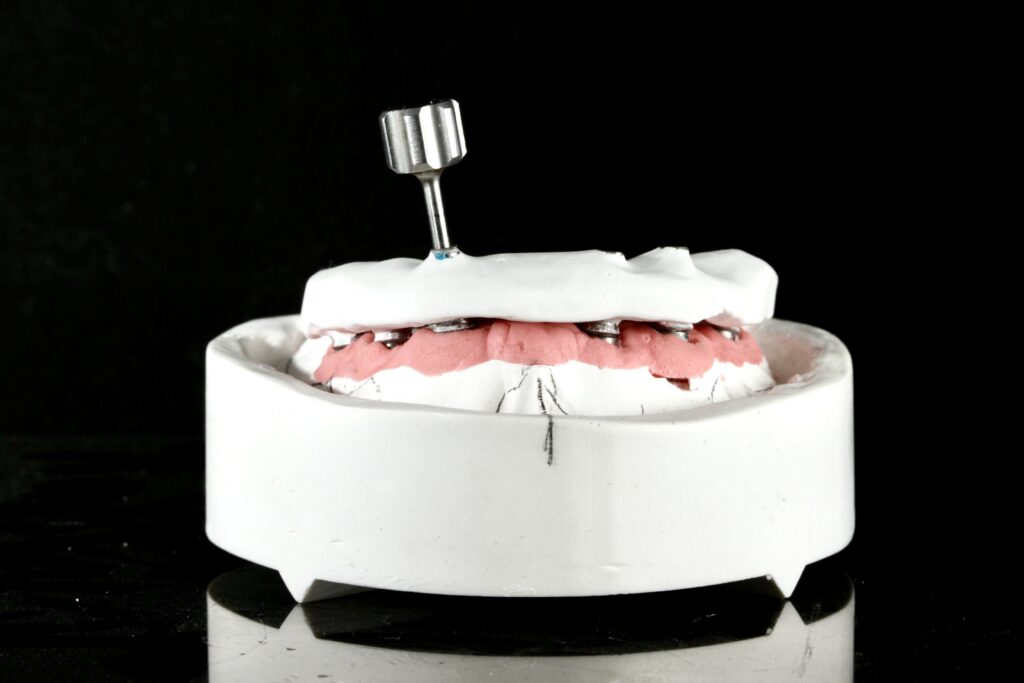
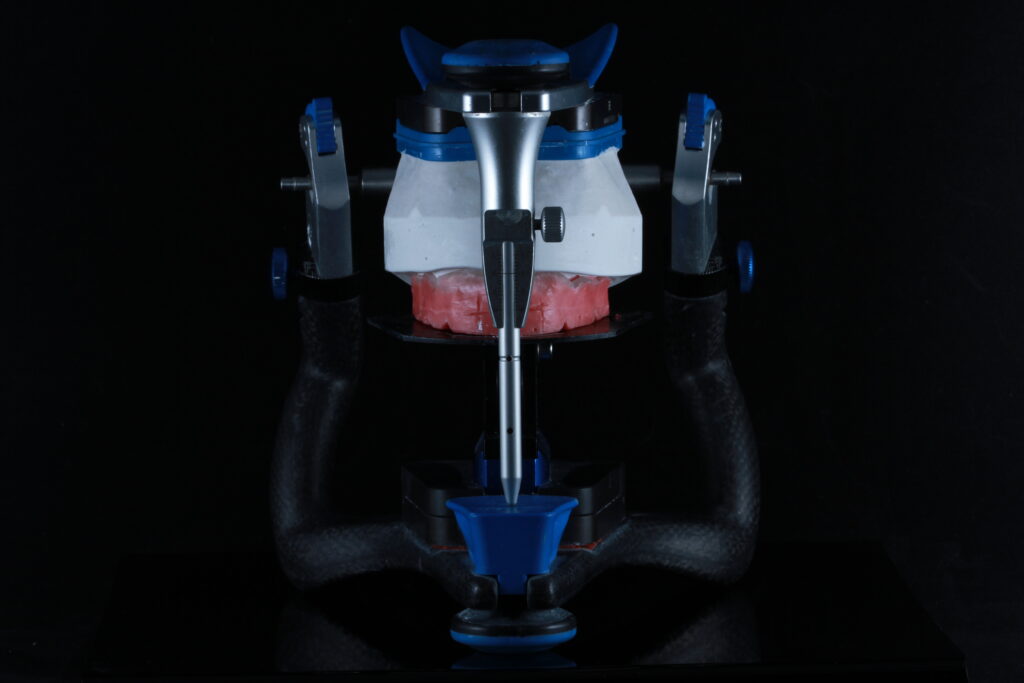
The master model was created by developing the impression obtained with the Class IV plaster replica, using distilled water in the proportions indicated by the manufacturer and with mechanical mixing in a vacuum (Figs. 3 and 4).
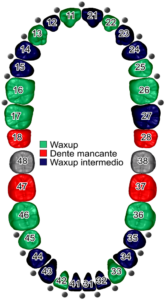
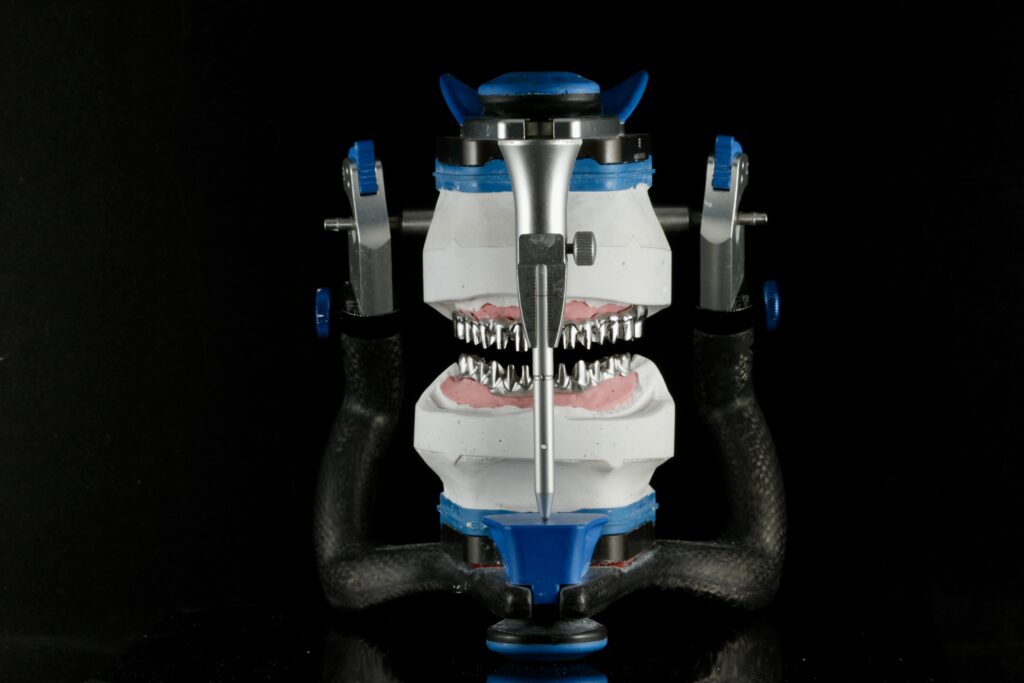
Once hardened, the transfers were removed and the master model was placed on the articulator using the replica and the facebow. The antagonist model was placed on the articulator with the silicone occlusal registration. A temporary base for mounting the teeth was created using a light-curing resin plate. Since the treatment plan involved the creation of a milled bar and a superstructure, preformed composite veneers were used in order to achieve a smaller footprint. With the models positioned on the articulator, the veneers were placed on the resin base, following the aesthetics of the transparent replica, using hard wax (Fig. 5).
Based on the shape and size of the teeth, the clinician, in agreement with the patient, deemed shape I47 suitable for the anterior teeth and shape L3 for the posterior teeth. The purpose of this initial assembly is to obtain an aesthetic prototype to be delivered to the clinician.
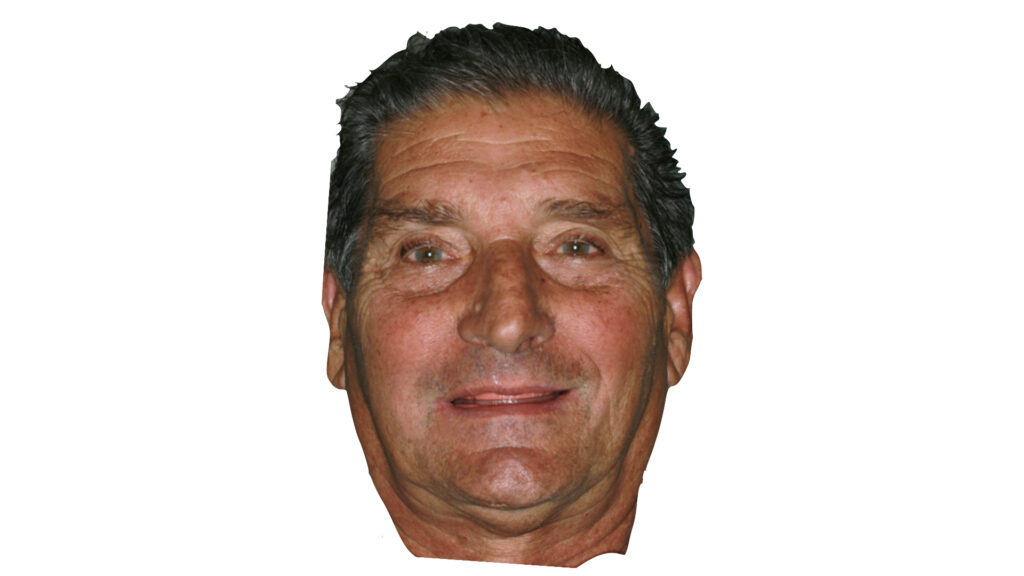
The patient was able to evaluate the aesthetic result before the restoration was finalized. The aesthetic prototype was placed inside the oral cavity and the clinician checked the aesthetics and phonetics, the size of the vestibular flanges and the resulting support of the upper lip, and the color of the dental elements. The occlusal relationships with the opposing arch were also checked, as well as lateral and protrusive movements (Fig. 6).
The necessary adjustments were made directly on the chair, as the veneers were mounted on wax. Once the patient’s consent had been obtained, the prototype was returned to the laboratory after undergoing the disinfection protocol.
In order not to lose the changes made by the clinician, a silicone mask was created using an articulator/verticalizer (Fig. 7).
Subsequently, the master model and aesthetic prototype were placed inside a mold, using the plexiglass cover, which was important for allowing light to pass through and the composite to polymerize in the subsequent stages. Two wax preforms were joined to the outermost parts of the prototype to create the injection channels, the mold was closed, and transparent silicone was poured inside (Fig. 8).
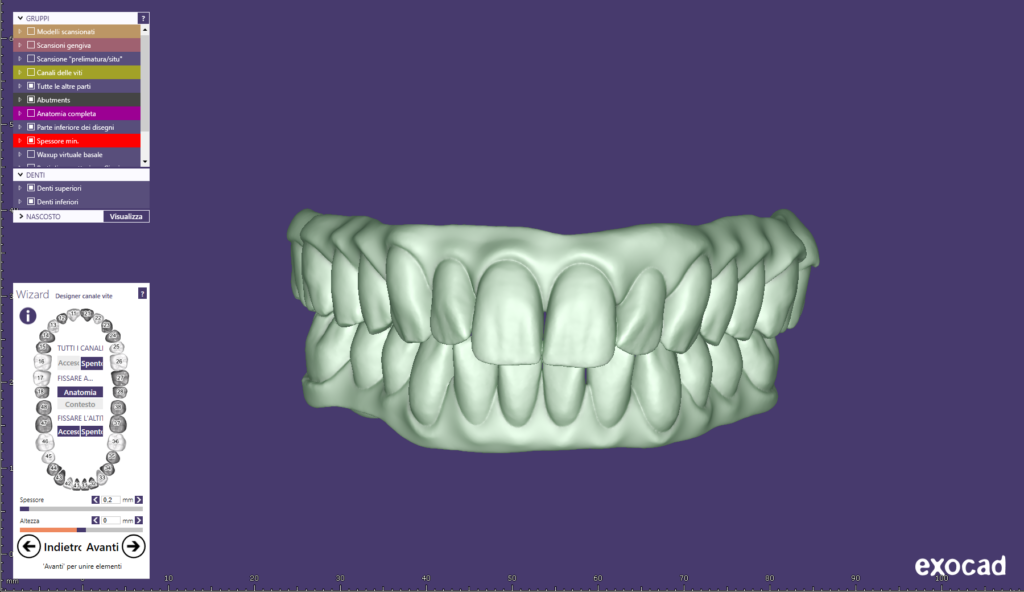
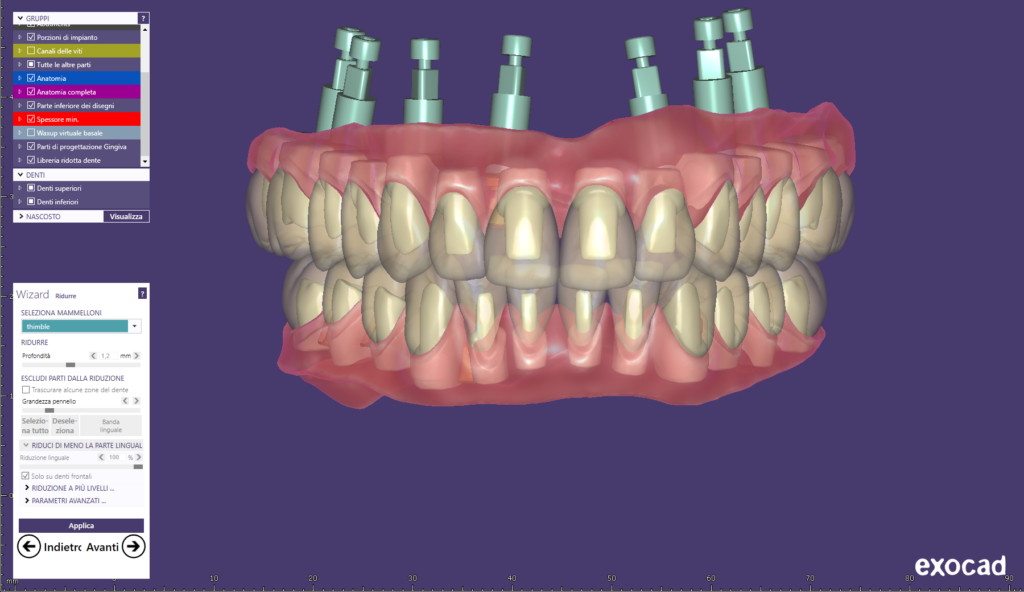
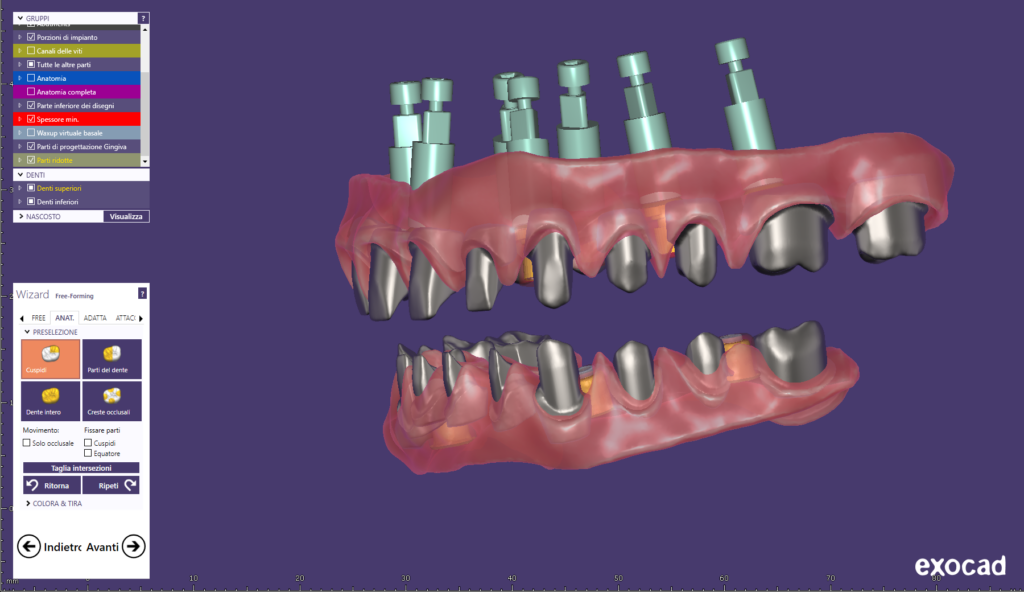
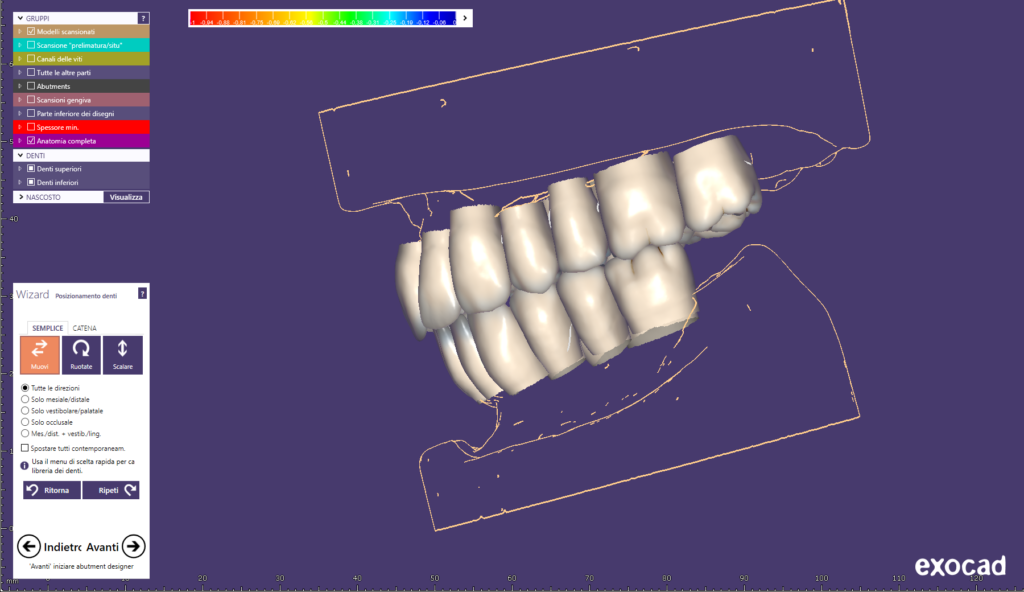
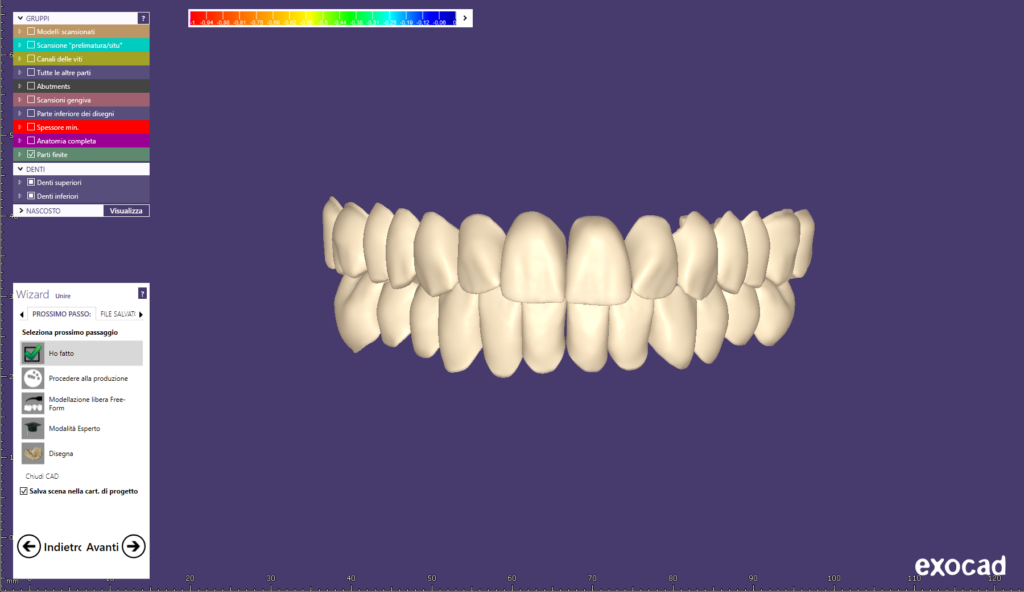
Once polymerization was complete, the prototype and master model were removed from the muffle and digitized using a laboratory scanner. The files obtained were loaded into modeling software (Fig. 9).
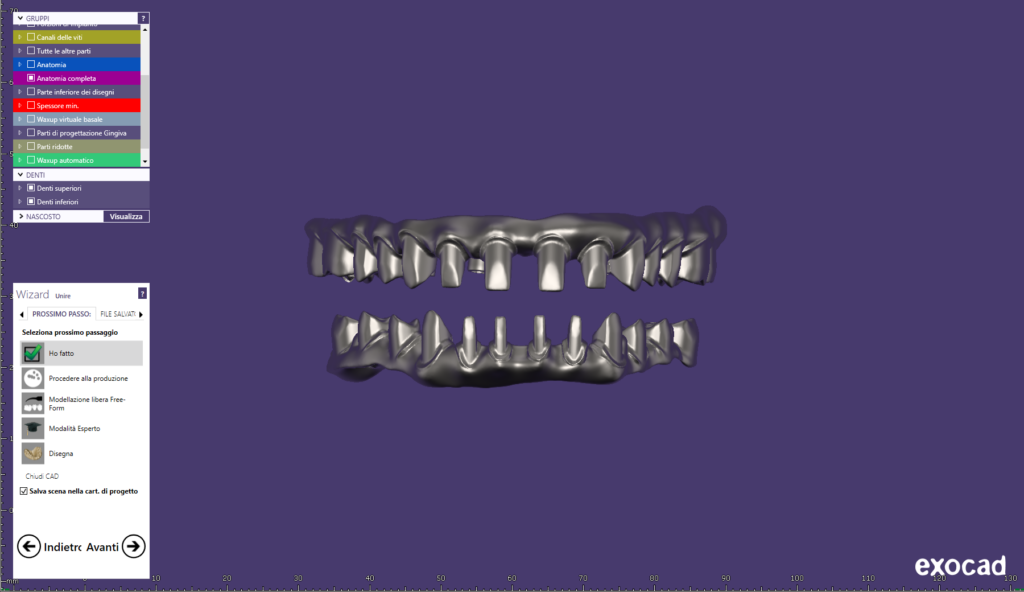
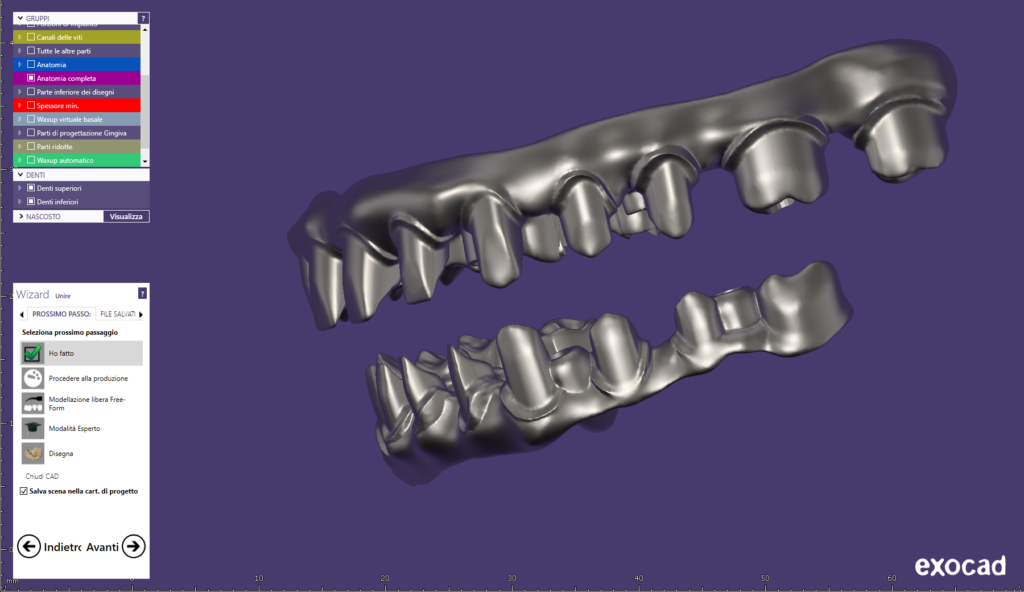
The primary bar was designed based on the prosthesis dimensions, so that the anchors were on a plane parallel to the masticatory plane. The surface of the bar facing the mucosa was designed to be convex, to minimize plaque/food accumulation and facilitate hygiene procedures. Using CAD/CAM technology, the bar was milled from a solid Magnum Splendidum cobalt-chromium wafer (Figs. 10 and 11).
The characteristics of this alloy allow for precise milling and easy polishing (Figs. 10 and 11). Four threaded anchors have been designed on the bar. The type of attachment chosen has a reduced vertical footprint compared to spherical attachments, saving space without compromising the retention of the attachment itself. These attachments were screwed directly onto the bar, on which the respective threaded holes were created during milling, avoiding the use of adhesives or welding (Fig. 12). This allows the clinician to replace them quickly and easily without having to remove the bar from the oral cavity, although this is unlikely to be necessary given the presence of an intermediate synthetic sheath that greatly reduces wear on the attachments. The bar with the anchors in place was delivered to the clinician.
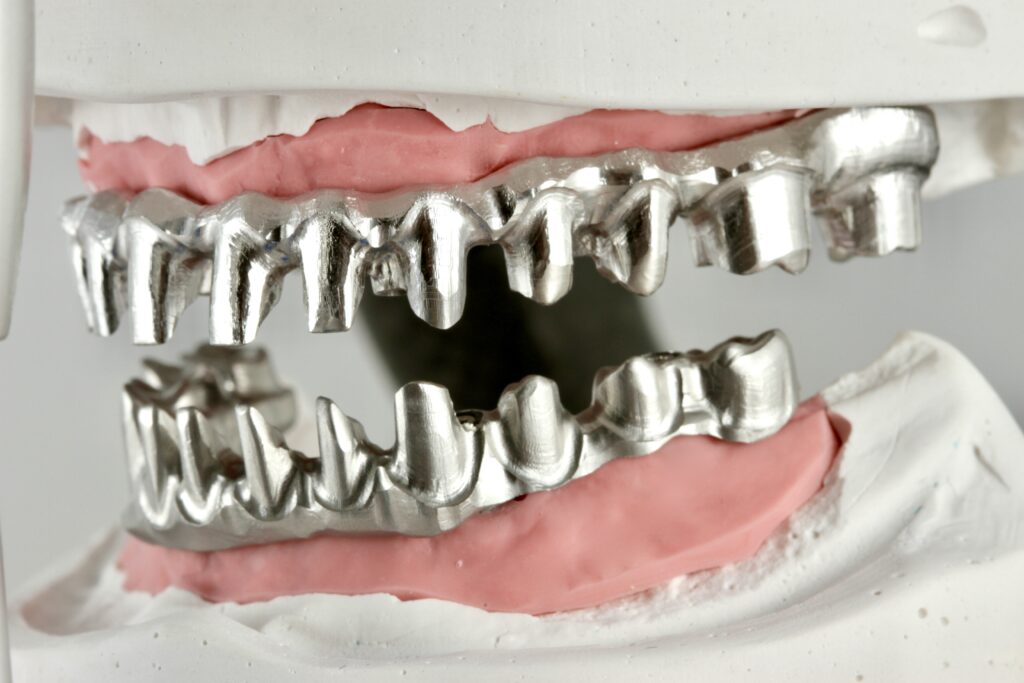
The clinician proceeded to screw the bar onto the abutments, checking for passivity (Fig. 13). The distance between the mucosa and the surface of the bar facing it plays a crucial role in the possibility of cleaning; for this reason, a test was carried out to verify that the patient was able to use interdental brushes and spongy dental floss to perform proper hygiene around the implants and between the bar and the mucosa. Points of excessive proximity to the mucosa were reduced. The bar was returned to the laboratory after the disinfection protocol.
The bar was positioned on the model and the undercuts were filled with wax. The pins and internal sheaths of the attachments were positioned and the assembly was placed in a duplication mold, into which duplication silicone was poured. The duplicate model was made by developing the mold with class IV plaster, using distilled water in the proportions indicated by the manufacturer and with mechanical mixing in a vacuum. A rigid thermoplastic mask with a thickness of 1 mm was printed on the model obtained as a basis for modeling the superstructure. The thermoplastic mask was positioned on the bar screwed to the master model; this was repositioned in the articulator and the veneers were locked in the correct position inside the silicone mold (Fig. 7). The anatomical supports for the veneers were modeled in wax (Fig. 14).
The mold was placed inside the casting cylinder, into which the refractory material was poured. The cylinder was preheated to 630 °C for 90 min, allowed to cool to 400 °C, and maintained at this temperature for 60 min. A predetermined amount of PEEK-based polymer was introduced into the cylinder and left in place for 20 min. The cylinder was placed inside the vacuum injection system apparatus and pressed at 4.5 bar. Once cooled, the coating was removed and the superstructure obtained was sandblasted (aluminum dioxide, 110 μm, 2.5 bar) (Fig. 15).
A primer was applied to the attachment studs and polymerized for 90 seconds. The studs were secured with dual adhesive. The bar and superstructure were positioned on the master model inside the investment ring. The gap between the two structures was filled with silicone. The inner part of the veneers was sandblasted (aluminum dioxide, 110 μm, 2.5 bar) and a primer was applied, which was polymerized for 90 seconds. The veneers were then locked onto the transparent silicone inserted into the mold cover, checking that there was no interference between them and the superstructure (Fig. 16). SFirst, a primer was applied to the outer surface of the superstructure using the same procedure described above, followed by an opaque material (Fig. 17), pink in color at the flanges and dentine in color at the veneers. The opaque material was polymerized for 90 seconds. The flanges were characterized with composite resin using the reverse layering technique; a specific composite was used on the inner part of the veneers. Once the mold was closed, the resin was mixed and injected into the inlet channel, and the system was maintained at 50°C for 25 min at a pressure of 2.5 bar.
The prosthesis obtained was finished using rotary instruments mounted on a laboratory micromotor and delivered to the clinician (Figs. 18 to 21).

Removable implant/mucosal-supported prostheses are a prosthetic solution that combines the aesthetics and lip support of a removable prosthesis with the stability provided by implants. Added to this is the greater ease of cleaning and the absence of bulk in the hard palate area.
The simplified protocol presented here reduces processing time without compromising the quality and precision of the prosthesis.
The use of space-saving anchors, screwed directly onto the bar without gluing or welding, makes them easy to install and replace, ensuring excellent retention in a smaller space.

Simone Fedi, who graduated with honors in dental technology, became the owner of a laboratory in Pistoia after working there for five years. He has a specialization in total prosthetics and many years of experience in the reverse layering technique for composites. In addition to being an official Mesa speaker, he is the renowned author of several national and international publications.
Ci impegniamo a rispettare la tua privacy. Lavoriamo ogni giorno per ridurre al minimo l’uso dei cookie, anche quelli tecnici, ma alcuni sono indispensabili per permetterci alcune attività. Puoi decidere tu come proseguire.